Configure Google Chrome in a multi-user environment

Installing and configuring Google Chrome in a multi-user environment can be everything but easy. More and more users change from Internet Explorer to a much more convenient browser and they expect to use it in business too. In this post, I will provide a short tutorial on how I usually install and configure Google Chrome for a non-popup seamless experience for your end user.
Installing Google Chrome is a basic next, next, next installation by using the MSI-file provided here. The problem with configuring Chrome is that there are several ways to set different kinds of settings. Sometimes you can configure the same type of settings in several places and sometimes you only have one place to configure some settings. There are mainly three ways of configuring settings – Policy based (ADMX-template), master preferences and tags on the shortcut when launching Chrome. I will be talking about the first two in this post. I always try to set as many settings as possible in a group policy (GPO) using the ADMX-templates. Why? Because it is much easier to update a GPO than to update a file on each session host.
Google Chrome is an application that configures and do many things in the background. Do you really want all users to be prompted to check the default browser, get a first-run introduction and create shortcuts on the desktop? Although this is a standard procedure that most users are familiar with, it is much more convenient (and enterprise) to not get any popups at all. Below is what I usually add in the “master_preferences”-file. I have not found a convenient way to see a full list of settings to configure, but this is the closest I have yet to come.
notepad "C:\Program Files (x86)\Google\Chrome\Application\master_preferences"{
"browser" : {
"check_default_browser": false
},
"sync_promo" : {
"show_on_first_run_allowed" : false,
"user_skipped": true
},
"distribution" : {
"skip_first_run_ui" : true,
"suppress_first_run_default_browser_prompt" : true,
"suppress_first_run_bubble": true,
"show_welcome_page" : false,
"import_search_engine" : false,
"import_history" : false,
"make_chrome_default": false,
"do_not_create_desktop_shortcut": true,
"do_not_create_taskbar_shortcut": true,
"do_not_create_any_shortcuts": true,
"create_all_shortcuts": false,
"do_not_launch_chrome": true
}
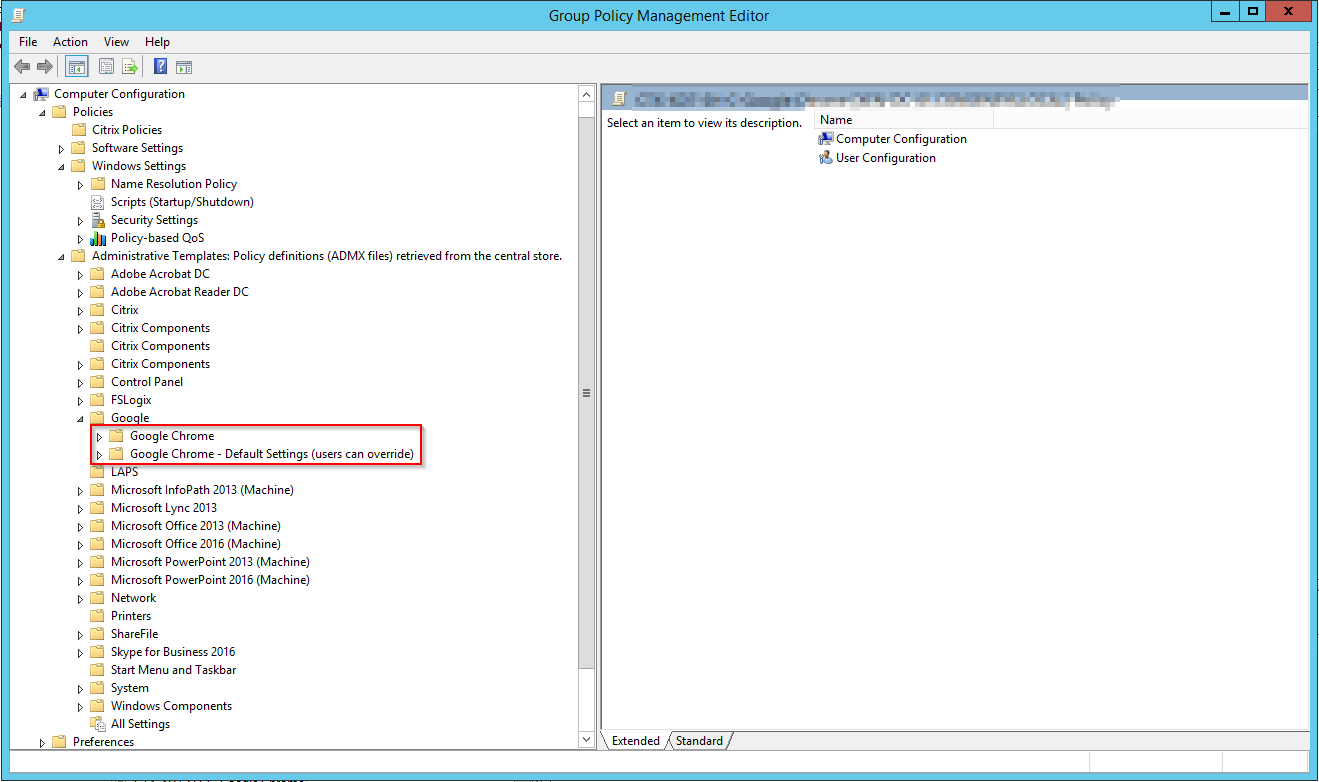
}After installing Google Chrome and adding the “master_preferences”-file I usually proceed by downloading the ADMX-templates from here. Download and install the ADMX-template in your central store. Browsing through the settings you should notice three things.
- All settings are applied to the computer, meaning that the settings configured do not affect user login time.
- There are two folders with policy. In “Google Chrome – Default Settings” the user may override all the configured defaults. In the other folder, the user may not override the configured defaults.
- The settings we configured using the “master_preferences” is not overridable.
Please browse through each setting in the group policy and configure the settings to your liking. Google Chrome saves a lot of settings and files in the user profile. If you are using roaming profiles, the profiles will soon begin to fill up and users will get a longer login time. There are two different approaches we can take. If your roaming profile system allows you to include and exclude files and directories you may use the first one below.
Include files:
AppData\Local\Google\Chrome\User Data\First Run
AppData\Local\Google\Chrome\User Data\Local State
AppData\Local\Google\Chrome\User Data\Default\Bookmarks
AppData\Local\Google\Chrome\User Data\Default\Favicons
AppData\Local\Google\Chrome\User Data\Default\History
AppData\Local\Google\Chrome\User Data\Default\Preferences
The second approach is to configure the policy “Set user data directory” to your home catalogue. I prefer using the second one due to it is much easier to manage.