Building a Magic Mirror in 2023

Back in 2014, I witnessed Michael Teenuw's groundbreaking invention - the Magic Mirror. It was an unforgettable moment as the project gained widespread attention for its unparalleled uniqueness and ingenious use of the Raspberry Pi. Since that awe-inspiring day, I've held onto the dream of creating my very own Magic Mirror. The journey to fulfill this dream began in 2016 when I purchased a two-way mirror and a monitor, taking the first steps towards crafting my magical creation. However, life's demands got the better of me, and unfortunately, I had to put the project on hold to create a Magic Mirror for the company I was working for, leaving my own Magic Mirror unfinished.
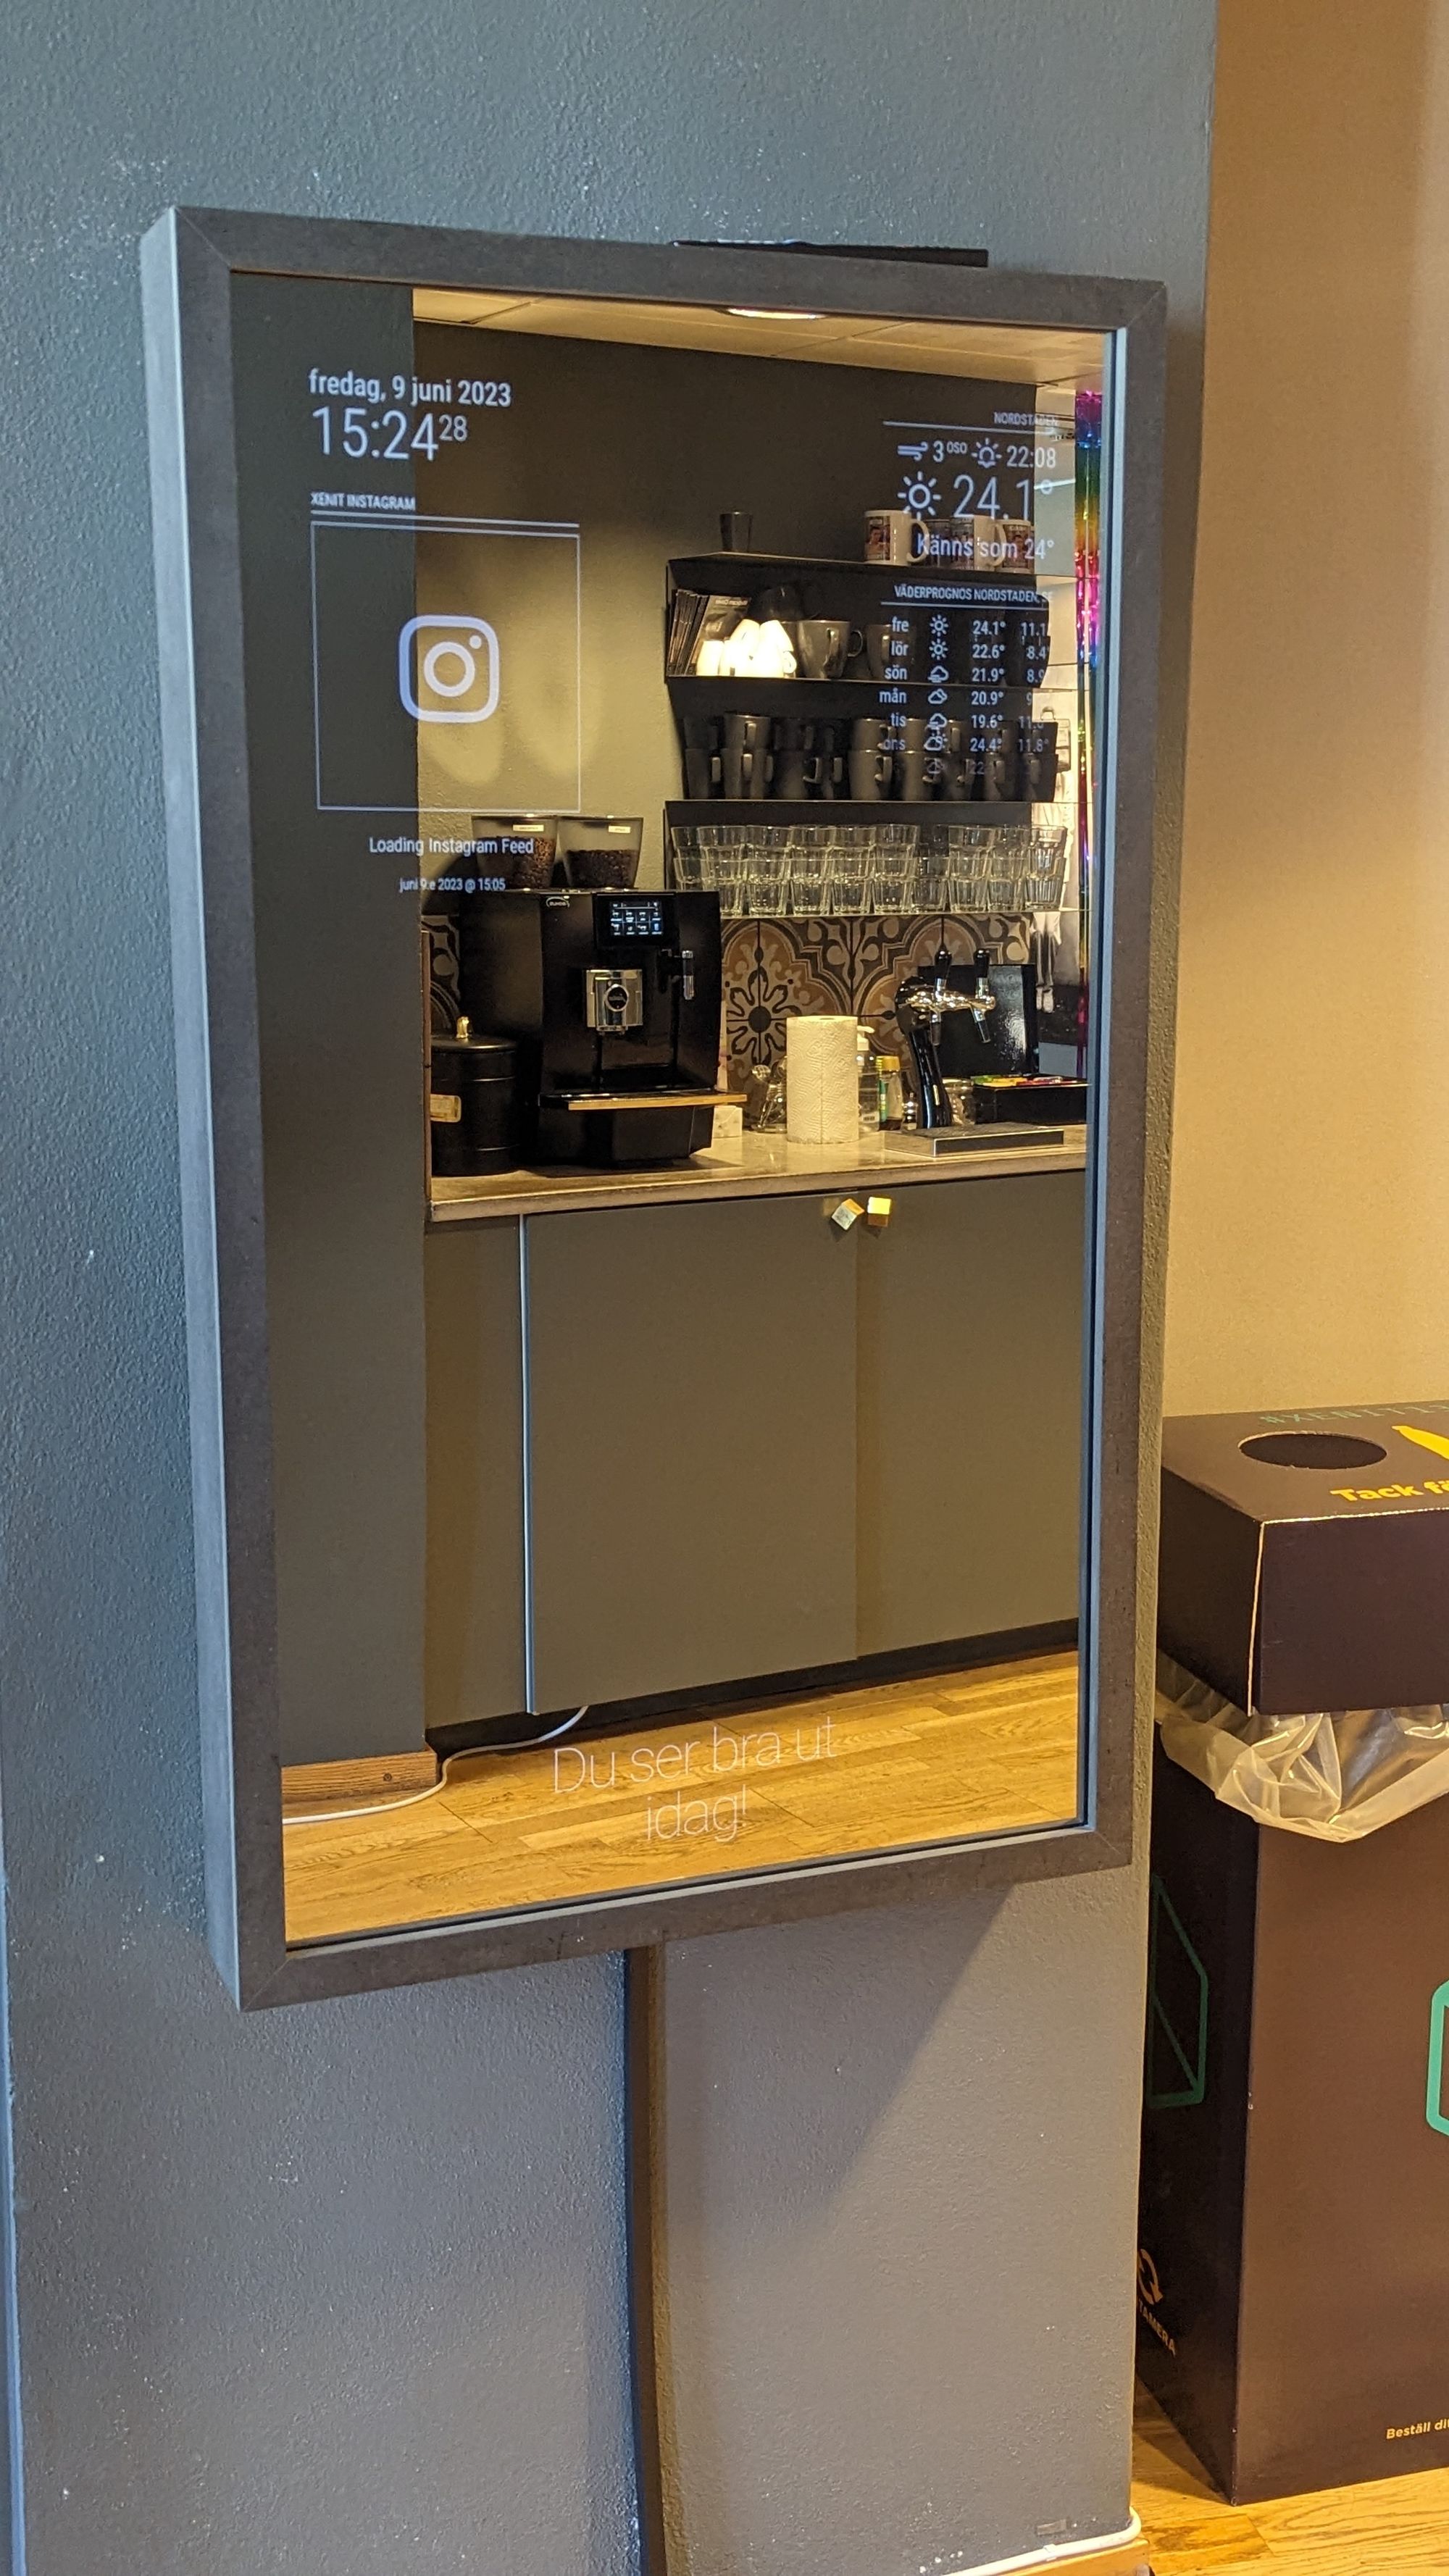
In 2017, I had the opportunity to craft a Magic Mirror for the company I was employed with, Xenit. To this day, it continues to captivate with its enchanting allure in the lobby of the company. While the image below showcases the final product created for them, it's essential to highlight the collaborative effort that brought this marvel to life. The company enlisted the skills of a talented carpenter to fashion an elegant frame that perfectly complemented the Magic Mirror's design. Meanwhile, I took charge of handling all the technical intricacies, ensuring that the mirror came alive with seamless functionality. It remains a proud achievement, beautifully blending the realms of carpentry and technical expertise.
Now, after seven long years, the time has come to breathe life into that dream once again. It's time to dust off the old pieces, reignite the spark of ingenuity, and embark on the thrilling adventure of bringing my Magic Mirror project to its long-awaited fruition.
What is a Magic Mirror?
For those who are new to this concept, a Magic Mirror is essentially a mirror with a technological twist. Instead of just reflecting your image, it comes to life by displaying information and interactive content. Imagine looking into the mirror while getting ready for the day and simultaneously checking the weather forecast, your daily schedule, or even reading the latest news headlines - all seamlessly integrated into the mirror's surface.
The Tech Behind the Magic
Creating a Magic Mirror might sound like a complicated task, but thanks to the readily available technology in 2023, it has become more achievable. Here's a general overview of the key components and steps involved:
1. Raspberry Pi or Similar Microcomputer
To power the Magic Mirror, you'll need a small computer like the Raspberry Pi. These tiny but powerful devices can run various applications and easily connect to a display.
2. Two-Way Mirror
You have probably already seen a two-way mirror before. Have you ever watched a detective series with an interrogation room? In police stations, two-way mirrors allow law enforcement to observe suspects without being seen. In our use case, we use the two-way mirror to allow text and graphics to be displayed on top of the mirror while still reflecting the image behind the glass. When light strikes a surface, it can be either reflected or transmitted (pass through) depending on the properties of the surface and the material it encounters. In the context of mirrors, regular mirrors reflect most of the light that strikes their surface, creating a clear and bright reflection of whatever is in front of them.
When light hits a two-way mirror, its behaviour depends on the relative intensity of the light on each side of the glass:
- Brighter Side (Observation Side): The side of the mirror with more intense light, such as a well-lit room or a room with a television display, is called the "observation side." People on this side will see a reflection because the intensity of the light on this side is greater than the light transmitted from the other side.
- Dimmer Side (Behind the Mirror): The side with lower light intensity, often a dark room or an area with little to no light, is the "behind the mirror" side. On this side, light can pass through the partially transparent coating, allowing observers to see through the glass.
As a result, when you have a well-lit room (observation side) and a dimly lit room (behind the mirror), people standing on the brighter side of the two-way mirror will see their own reflection, just like with a regular mirror. However, from the dimmer side, people can see through the glass, making it appear as though the mirror is one-way, allowing them to observe the brighter side.
3. Monitor and Frame
Behind the two-way mirror, you'll place a monitor or a panel that serves as the display for the Magic Mirror. A frame is used to hold everything together and provide a clean finish. Finding a frame that meets the specific requirements of a Magic Mirror can be a challenging task. The depth of the frame is a critical factor, as it needs to accommodate both the two-way mirror and the monitor, leaving enough space for proper airflow and ventilation to prevent overheating. A frame that is too shallow might not provide enough space for the monitor, and one that is too deep could lead to unsightly gaps.
4. Magic Mirror Software
Luckily for me, the Magic Mirror project by Michael Teenuw is very much alive. In 2016 he released MagicMirror2 to create a flexible and user-friendly modular system, one that enables users to install extensions seamlessly without modifying the core framework. Additionally, there was a growing need for a streamlined installation process, eliminating the requirement for webservers and browsers, and presenting an all-in-one solution. Nowadays, there are tons of modules for the MagicMirror2 project. Just check out the 3rd party modules on GitHub. However, some of these modules have been abandoned by the author. Although, in most cases, there are forks that are still working great.
5. Customization and Personalization
The beauty of creating your Magic Mirror lies in customization. You can tailor the content and layout to suit your preferences and needs. Whether you want a minimalist design or a data-rich display, it's all up to you!
Putting it All Together
Now that you have grasped the idea and understand what components are needed, assembling the Magic Mirror is like putting together a puzzle. Mount the monitor behind the two-way mirror, place it within the frame, and connect the Raspberry Pi to power everything up. After installing the chosen MagicMirror2 software, tweak the settings and modules to create your desired user interface.
Creating the Magic Mirror
The frame
As I mentioned earlier, my journey with this project began back in 2016 when I purchased a 70cm x 50cm two-way mirror from a skilled glazier. Opting for this standard size seemed like a practical choice, as it meant I could easily find a variety of standard frames to complement it.
However, what I hadn't anticipated was the challenge of finding a frame with the required depth of more than 5cm. It turned out to be more complicated than I had initially thought, and this obstacle dampened my enthusiasm to continue at that time. I lacked access to the necessary tools and resources to create my own frame, making it difficult to find a suitable pre-made one that met the specific depth requirements. The setback, unfortunately, put a temporary halt to my progress on the Magic Mirror project. Nonetheless, my passion for this endeavor never waned.
The monitor
The monitor I acquired for the project was larger than the monitor I wanted to use, introducing a new challenge - aligning it precisely in the center of the glass. While it did pose a bit of a dilemma, I've come too far in the process to make any drastic changes now. All the components are in place, and I'm committed to seeing this through to the end. Despite the minor setbacks, I'm determined to find creative solutions and complete my magical venture.
In 2016, I ventured into purchasing a monitor, which turned out to be quite a challenging task. Given my plan to use the monitor in portrait orientation, its width played a pivotal role in determining the mirror's height. As a result, I had to be highly selective in my search. My quest led me to evaluate numerous brands, but many were swiftly ruled out due to the placement of power and video connectors on the back of the monitor. In my case, I required these connectors to be conveniently mounted on the sides to fit my specific setup.
The biggest problem when choosing a screen is that you need to choose one of the following options:
- Buy a screen where the frame around it can be removed, or
- Buy a screen with very small bezels so that the screen is close to the mirror.
I bought a screen in 2016, but since the project was put on hold, and I moved a couple of times since then, I had simply misplaced the screen when I tried to find it in 2023. At the same time, I had an old Asus screen that I used as a secondary monitor. This one had a 1mm bezel and had the connectors on the side. That's why I ended up using this screen for the project. Since the screen had such small bezels, I didn't need to remove the frame around it.
The hardware and software
I had an old Raspberry Pi 3 that I wanted to use as a client for the screen. The Raspberry Pi 3 received power through USB from the screen and then connected to the screen via HDMI, with the HDMI cable running from the Raspberry Pi 3 to the HDMI port on the screen.
There are several ways to install MagicMirror, either manually, automatically with scripts, using Docker, Kubernetes, or MagicMirrorOS. Since I'm a big fan of Docker, it felt most natural to use this approach. At the same time, I was unsure whether to run the entire Magic Mirror container on the client or split it up so that the Raspberry Pi 3 was only a "dumb client" that displayed the Magic Mirror website hosted on another local server. There are pros and cons to running everything on the same client or splitting it up, but I chose to split it up.
On my Raspberry Pi 3, hereafter referred to as the client, I chose to install Raspberry Pi OS (64-bit). I tried installing Ubuntu Desktop 22.04.3 LTS (64-bit), but it was too slow for the client to handle as an operating system. After that, I first installed RealVNC to be able to remotely connect to the client.
sudo apt install realvnc-vnc-server

sudo raspi-config
3 Interfacing Options
     I3 VNC
          Would you like the VNC Server to be enabled? > Yes
               Wait until finished
          The VNC Server is enabled > OK
I enabled auto-login on the client.
sudo raspi-config
1 System Options
     S5 Boot / Auto Login
          B4 Desktop Autologin > OK
And then finally rotate the screen, autohide the Mouse Pointer and auto start Chromium to the IP of my server.
### ROTATE SCREEN ###
Login via VNC and use
xrandr --output HDMI-1 --rotate right

### AUTOHIDE THE MOUSE POINTER AND START CHROMIUM AUTOMATICALLY ###
sudo apt-get install unclutter
nano ~/.config/lxsession/LXDE-pi/autostart
     @lxpanel --profile LXDE-pi
     @pcmanfm --desktop --profile LXDE-pi
     @xscreensaver -no-splash
     @unclutter -display :0 -idle 3 -root -noevents

     @chromium-browser --noerrors --disable-session-crashed-bubble --disable-infobars --disable-gpu --start-fullscreen --app=http://10.0.0.11:8080/
On my server, I chose to use the Karsten13 fat image for Magic Mirror and The Magic Mirror Package Manager (MMPM). The difference between the different types of images can be found in Karsten13's documentation here. The final configuration is as follows.
version: "3"

#########################################################
# SECRETS
#########################################################


#########################################################
# SERVICES
#########################################################
services:

##########################################
# MAGIC MIRROR
##########################################

### MAGIC MIRROR
  mm:
    image: "karsten13/magicmirror:fat"
    restart: "unless-stopped"
    container_name: "mm"
    network_mode: "host" # Need this for MMM-Sonos to work.
    environment:
      TZ: $TZ
      MM_SHOW_CURSOR: "true"
    volumes:
      - $DOCKERDIR/services/magicmirror/mm/app/config:/opt/magic_mirror/config
      - $DOCKERDIR/services/magicmirror/mm/app/modules:/opt/magic_mirror/modules
      - $DOCKERDIR/services/magicmirror/mm/app/css:/opt/magic_mirror/css
    command:
      - npm
      - run
      - server

### MAGIC MIRROR PACKET MANAGER
  mmpm:
    image: "karsten13/mmpm:latest"
    restart: "unless-stopped"
    container_name: "mmpm"
    ports:
      - "7890:7890"
      - "7892:7892"
    volumes:
      - $DOCKERDIR/services/magicmirror/mm/app/modules:/home/node/MagicMirror/modules
      - $DOCKERDIR/services/magicmirror/mm/app/config:/home/node/MagicMirror/config
      - $DOCKERDIR/services/magicmirror/mm/app/css:/home/node/MagicMirror/css
      - $DOCKERDIR/services/magicmirror/mmpm/app/config:/home/node/.config/mmpm
    networks:
      - outside #Need to connect to MagicMirror UI
      - inside
    depends_on:
      - mm

#########################################################
# NETWORKS
#########################################################
networks:
  inside:
    external: true
  outside:
    external: true
Putting it all together
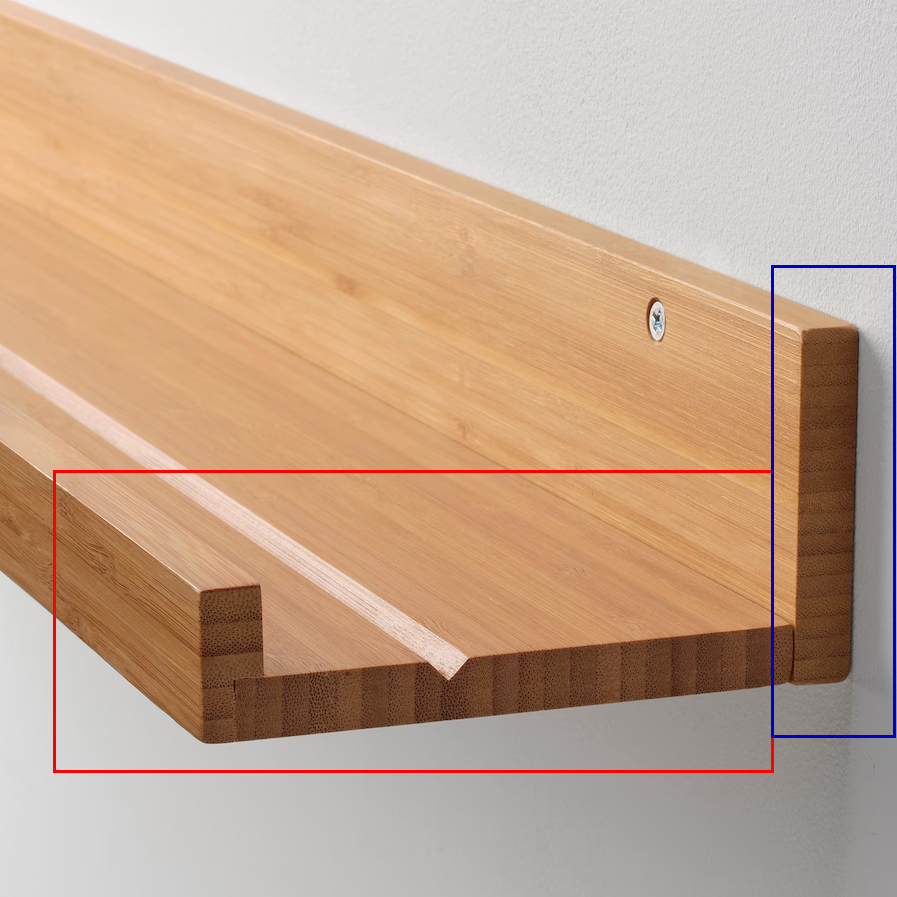
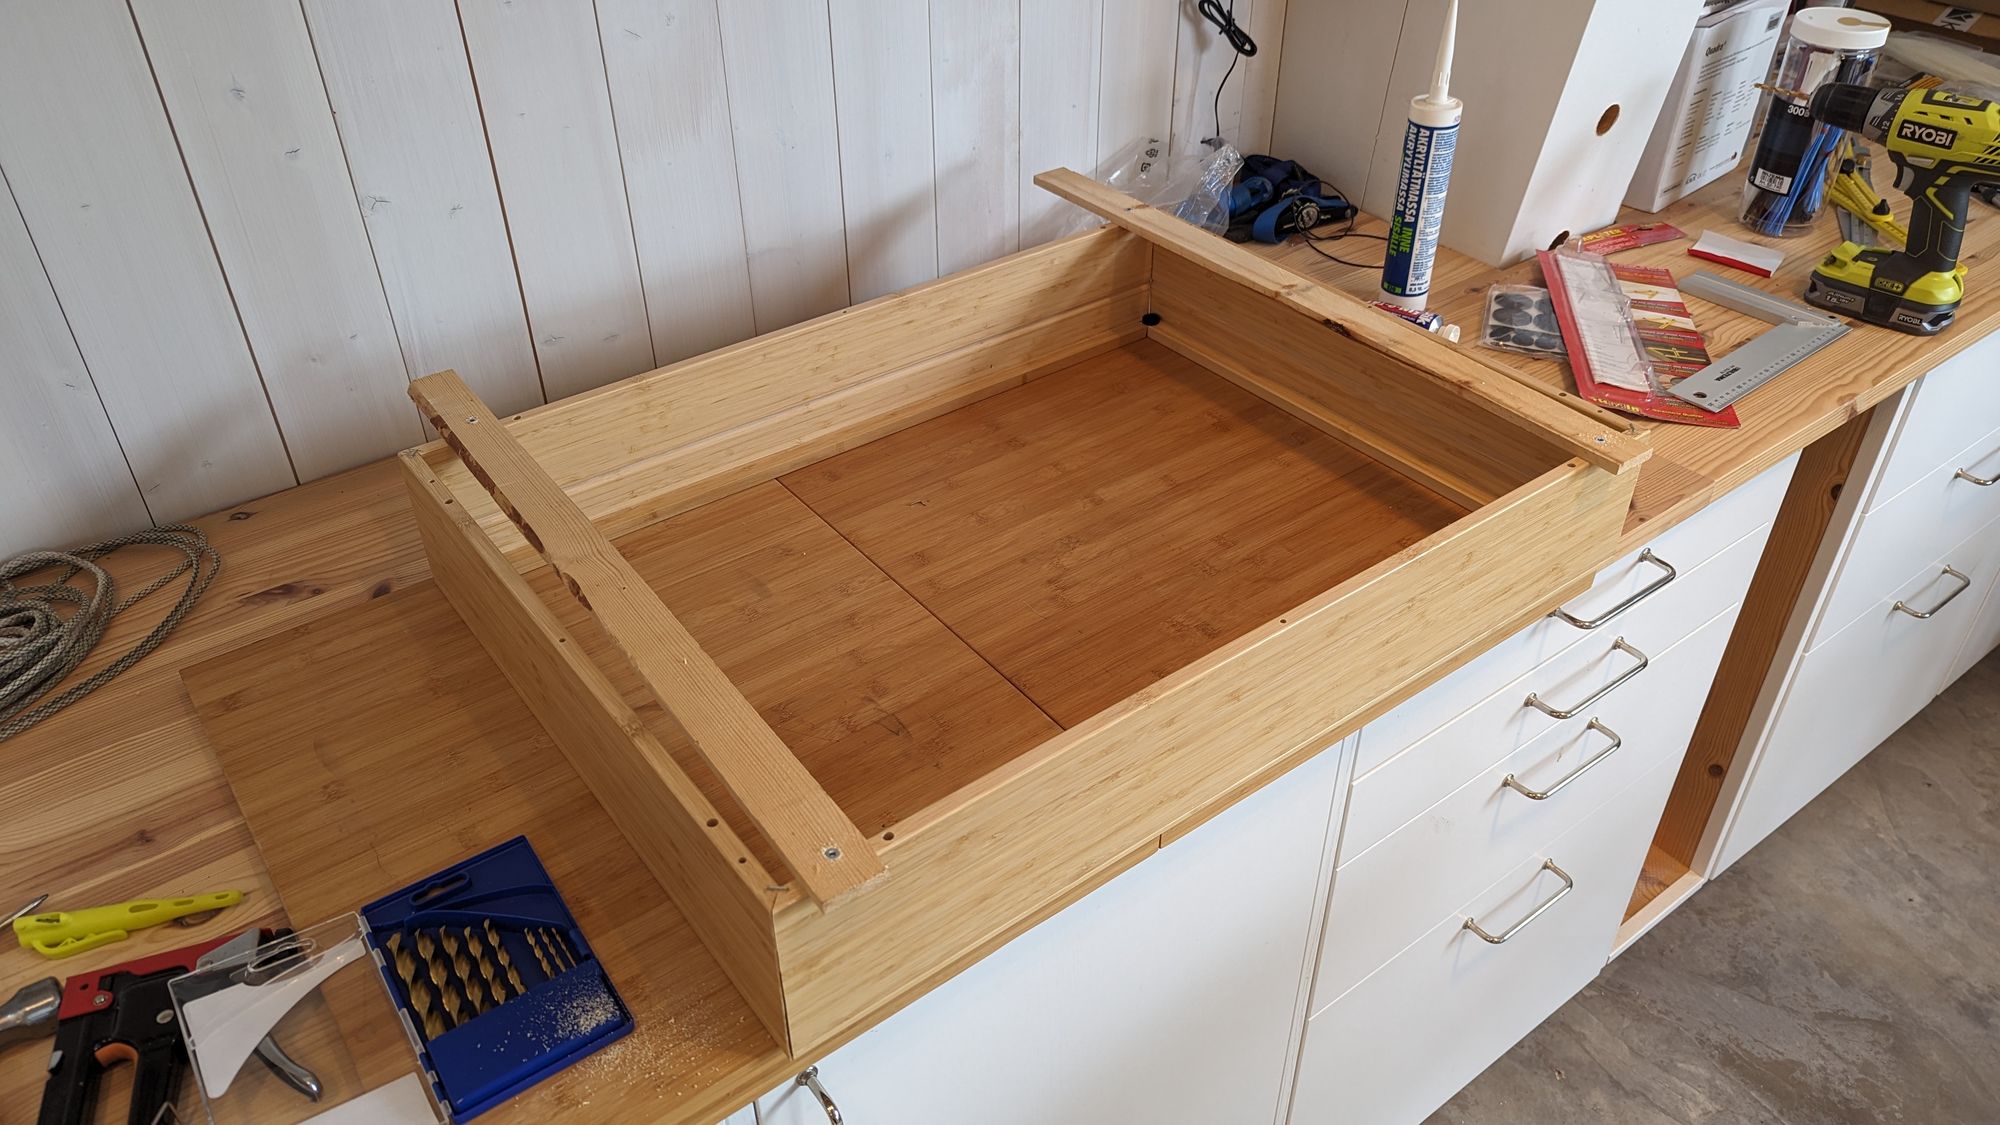
Okay, so I had chosen my monitor. Now, onto the issue of creating a frame for the mirror. Since I had trouble finding a frame that had the right dimensions and sufficient depth, I decided to make my own frame. For this, I opted to purchase 4 pieces of Målerås shelves from IKEA. 2 pieces were 75cm in length, and 2 pieces were 55cm in length (remember that the mirror was 70cmx50cm). The reason I chose Målerås was that the backside of the shelf board was not glued on initially (blue rectangle in the picture). Therefore, I could use the L-shaped board and place it on its edge to attach the mirror (red rectangle in the picture).
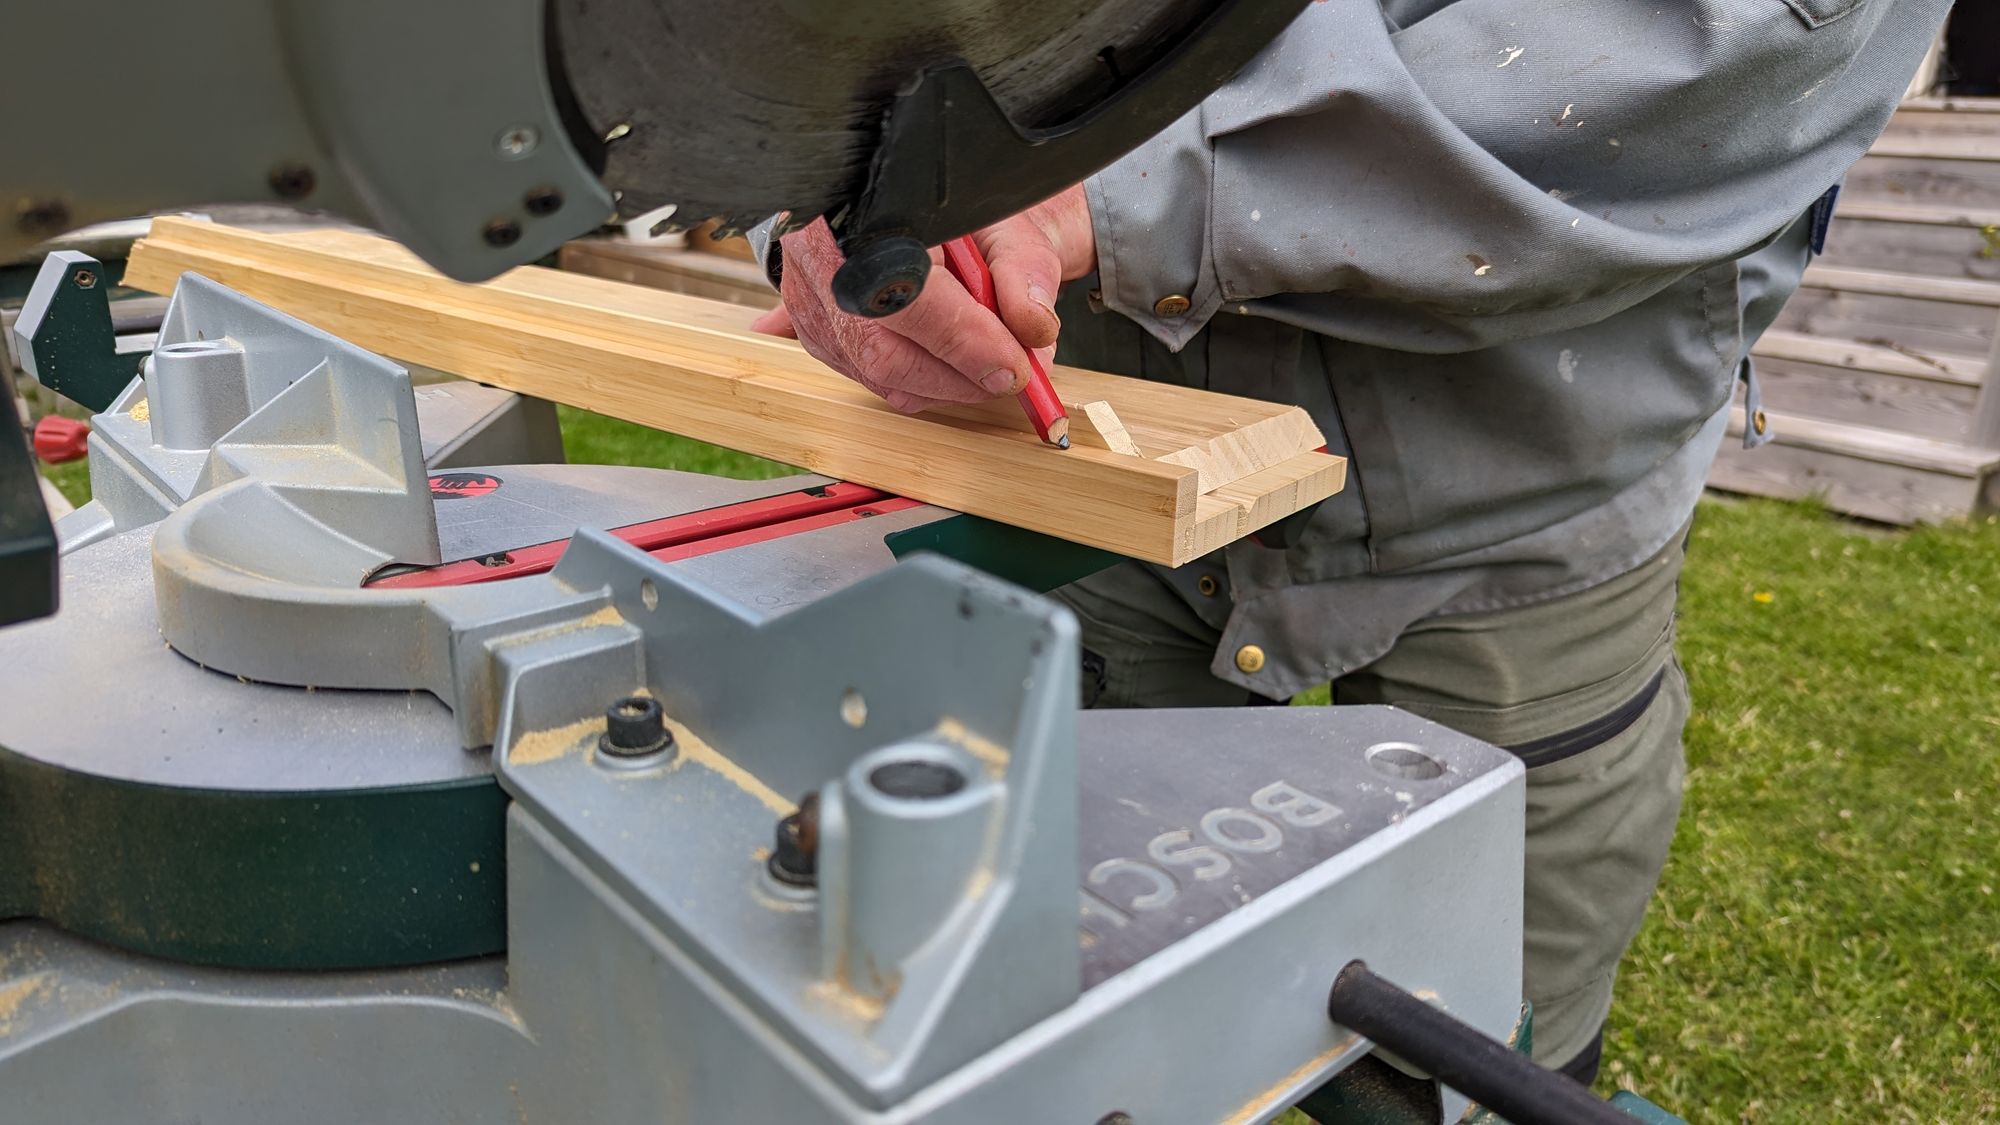
Since the parts were 5 cm too long on each side, I got assistance from my father and a neighbor to trim 2.5 cm off each side while also making a 45-degree cut to join the shelf board into a frame.
After that, I assembled the boards into a frame.
... and then painted the frame matte black.
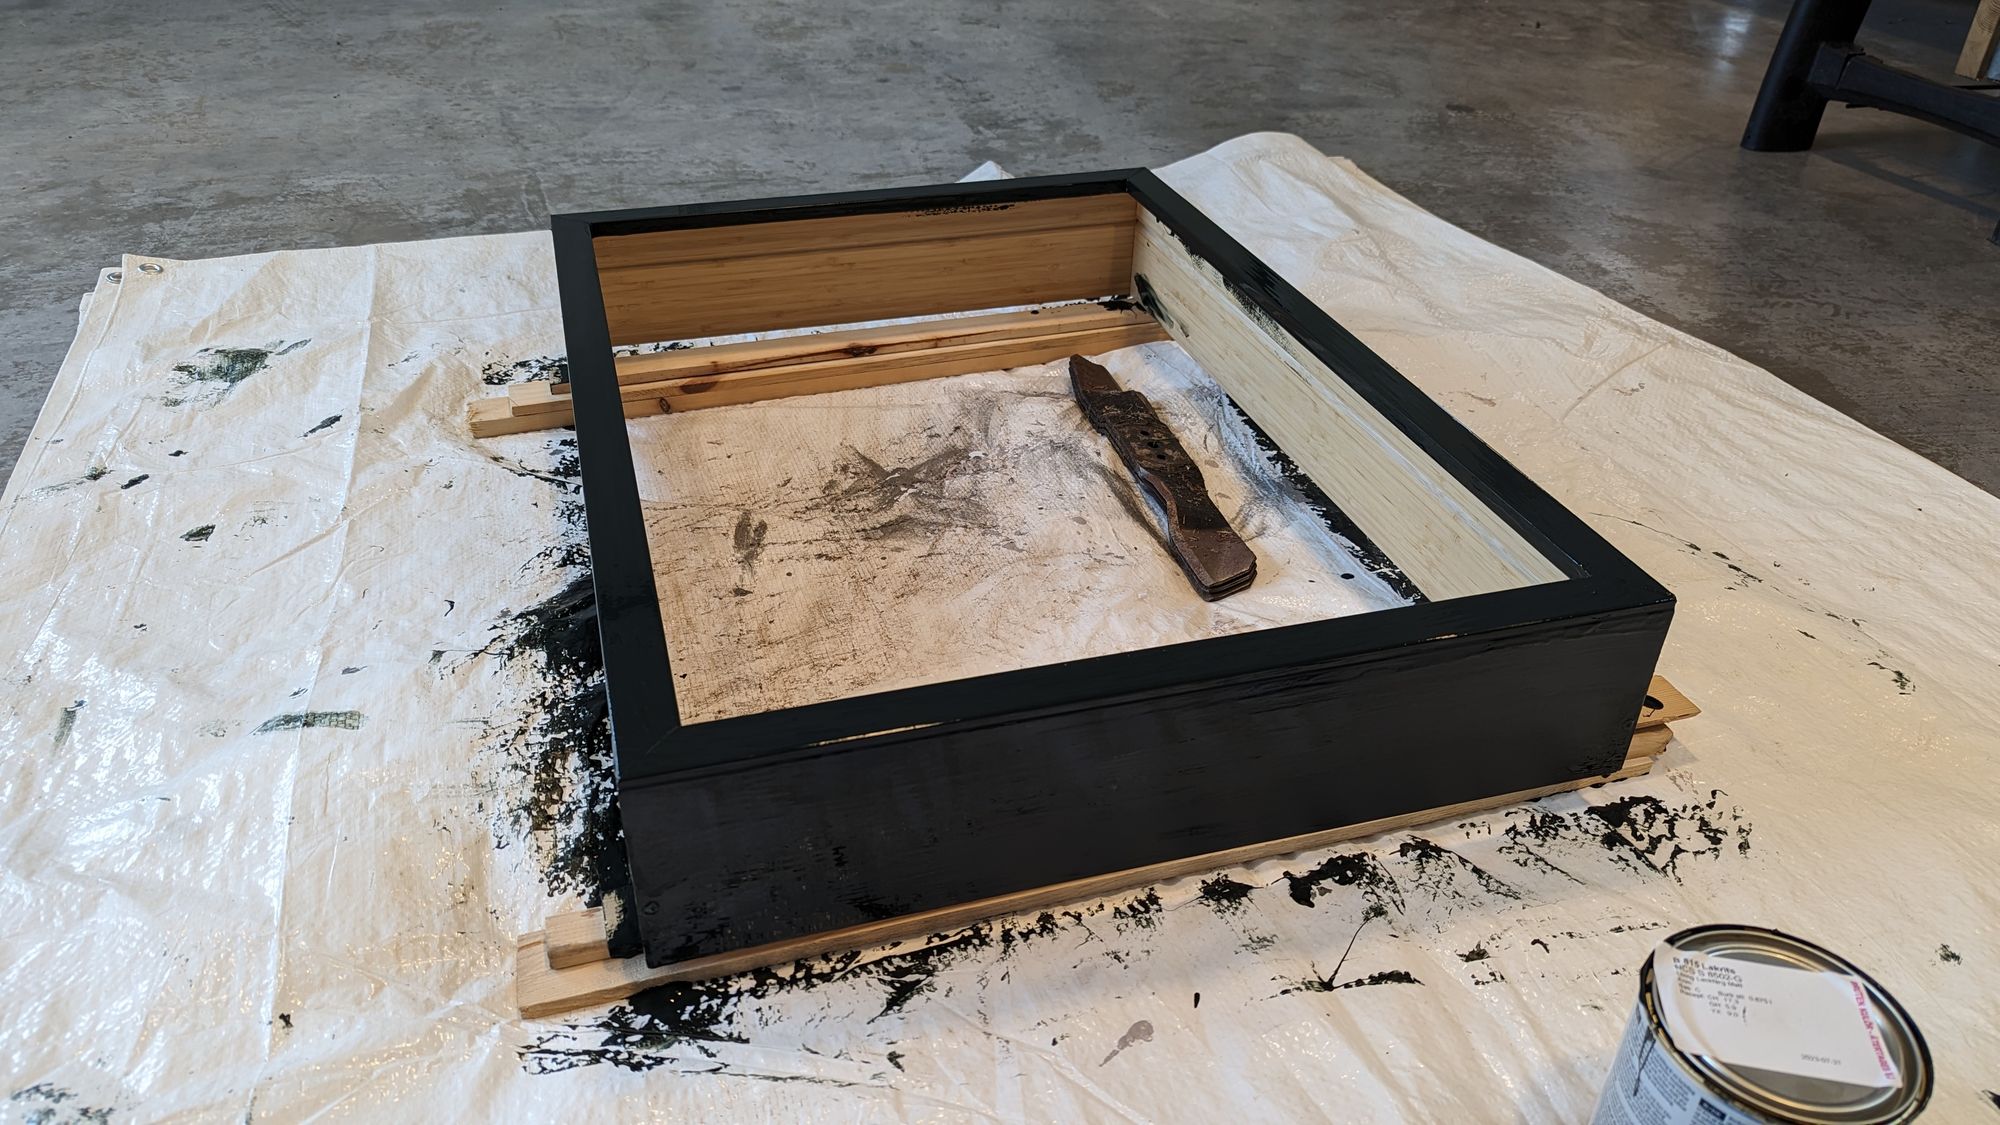
Painting took the longest time. A key factor is to never rush when painting, and to achieve an even and smooth finish on all sides, I chose to paint in layers, which took a total of one week, including drying time. Then, we glued the mirror to the frame.
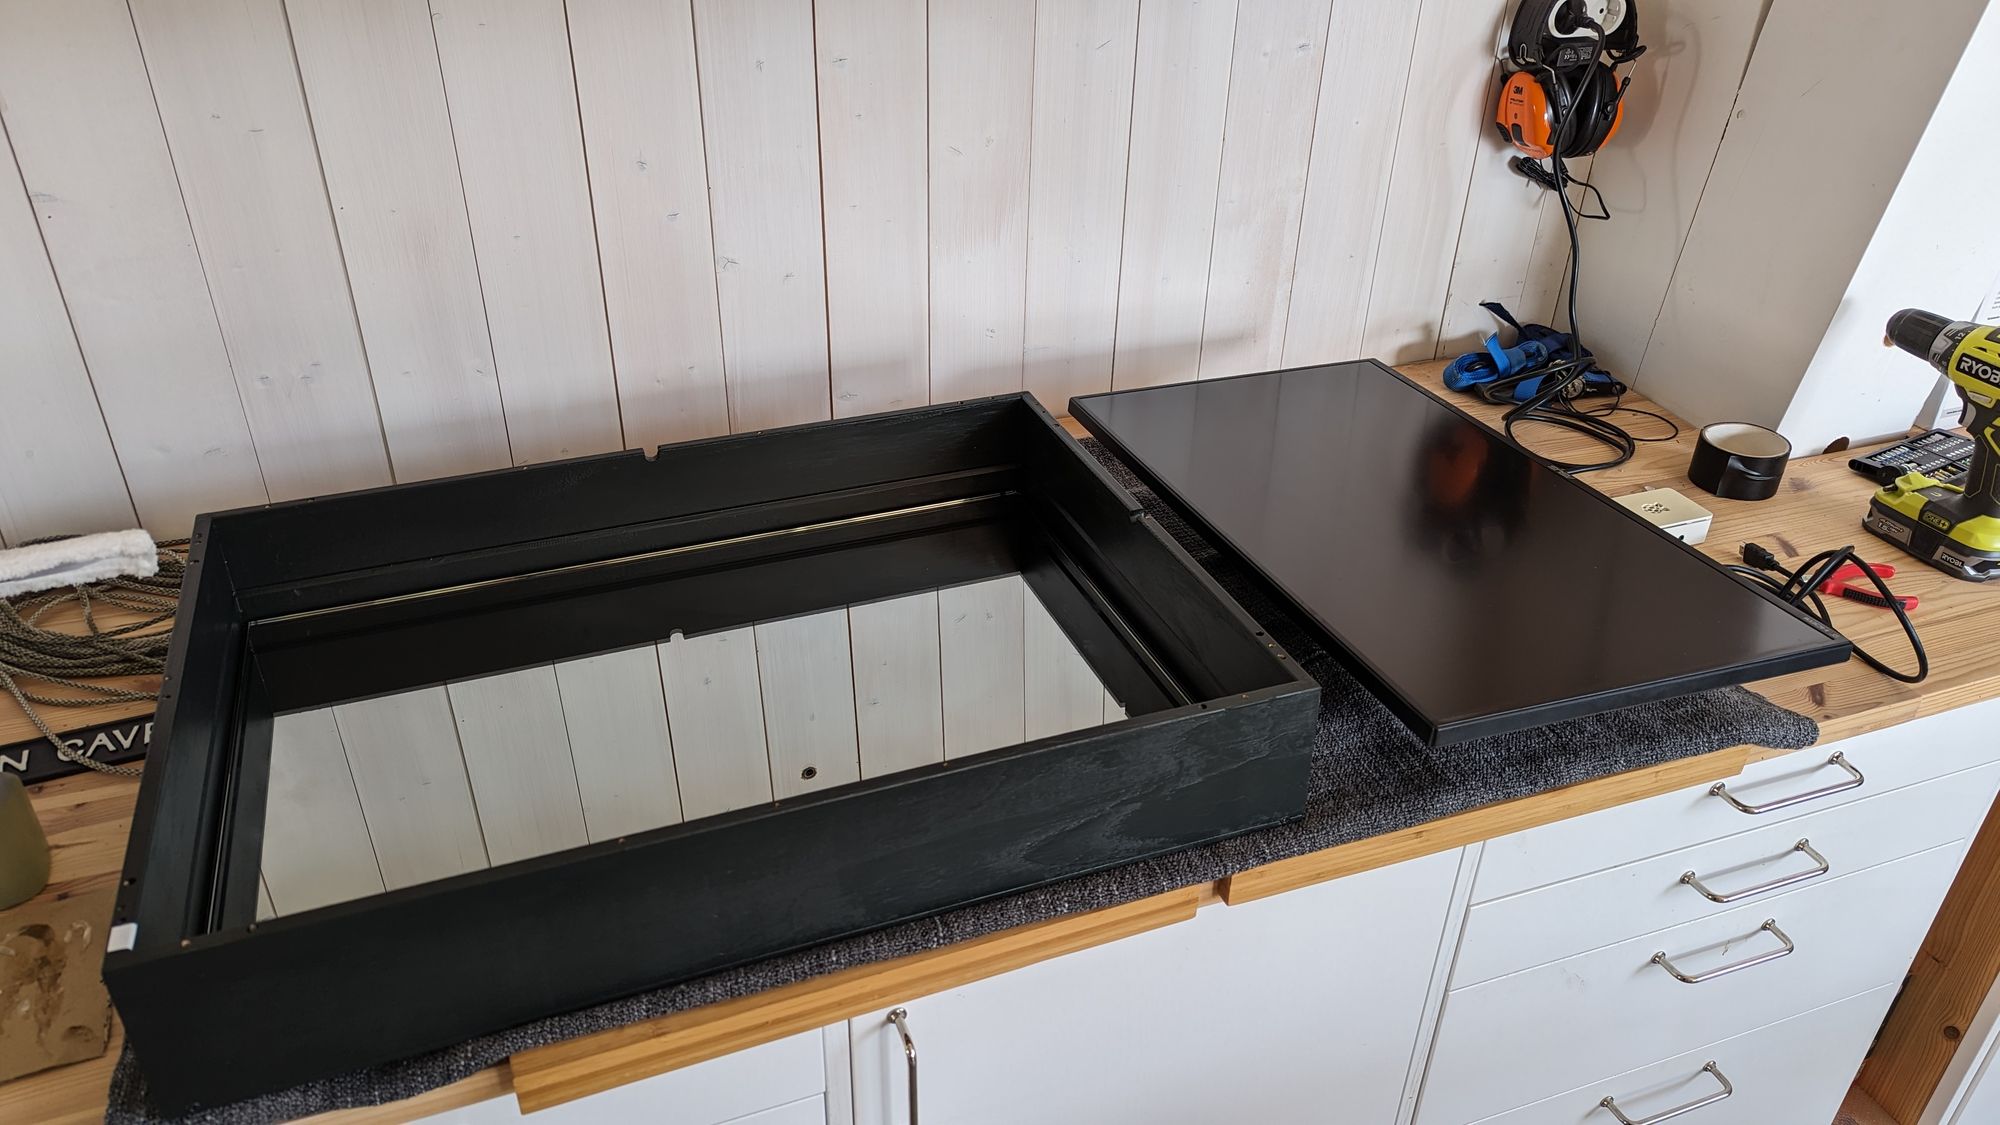
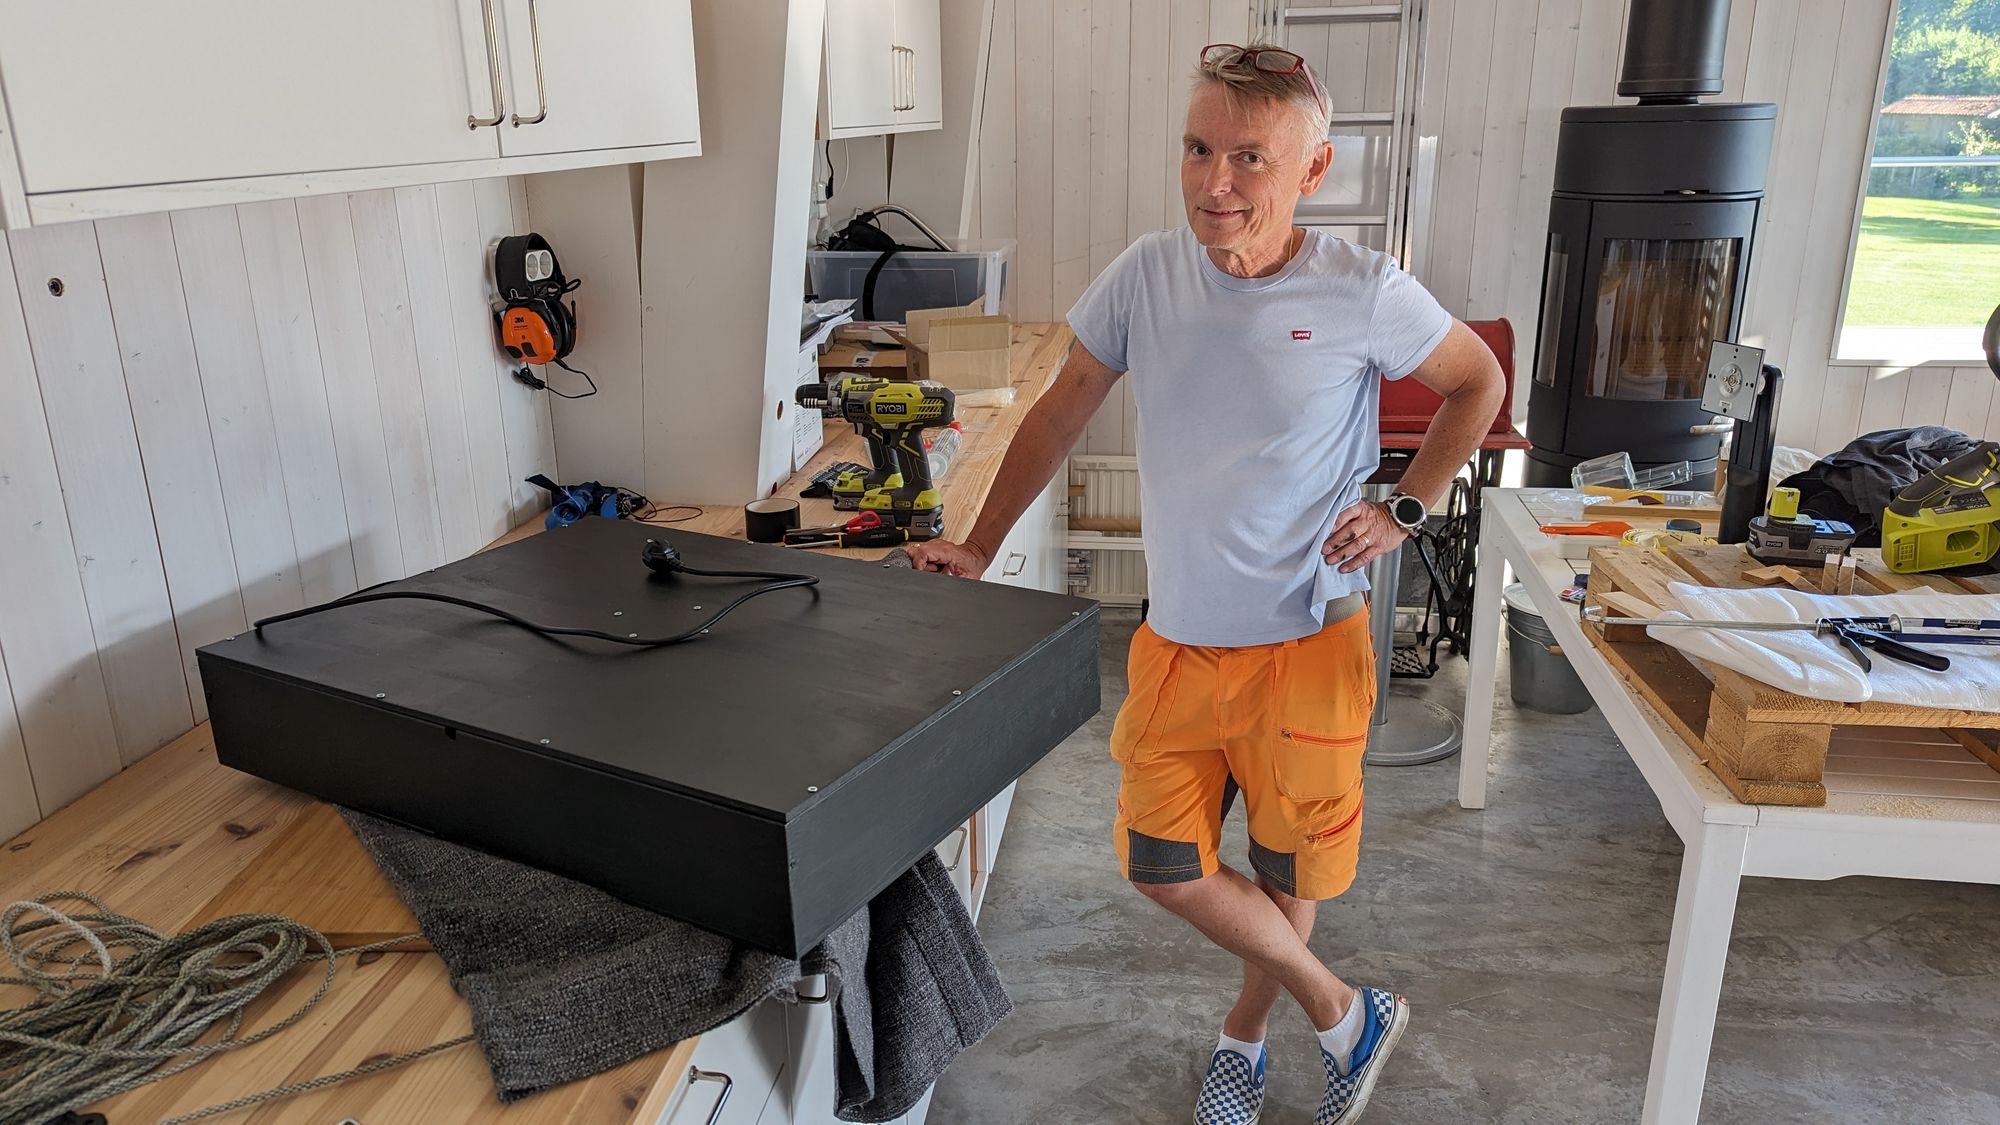
And finally, we plugged in the client (Raspberry Pi 3) to the monitor and then attached the back piece. Since the frame became deeper than the screen, I created a 100x100mm panel to fill the depth behind the screen up to the back panel. Afterward, I secured the panel to the VESA mount on the screen and then attached the panel to the back.

The last thing we did was drill a small hole in the back panel to hang the Magic Mirror on a screw mounted on the wall.
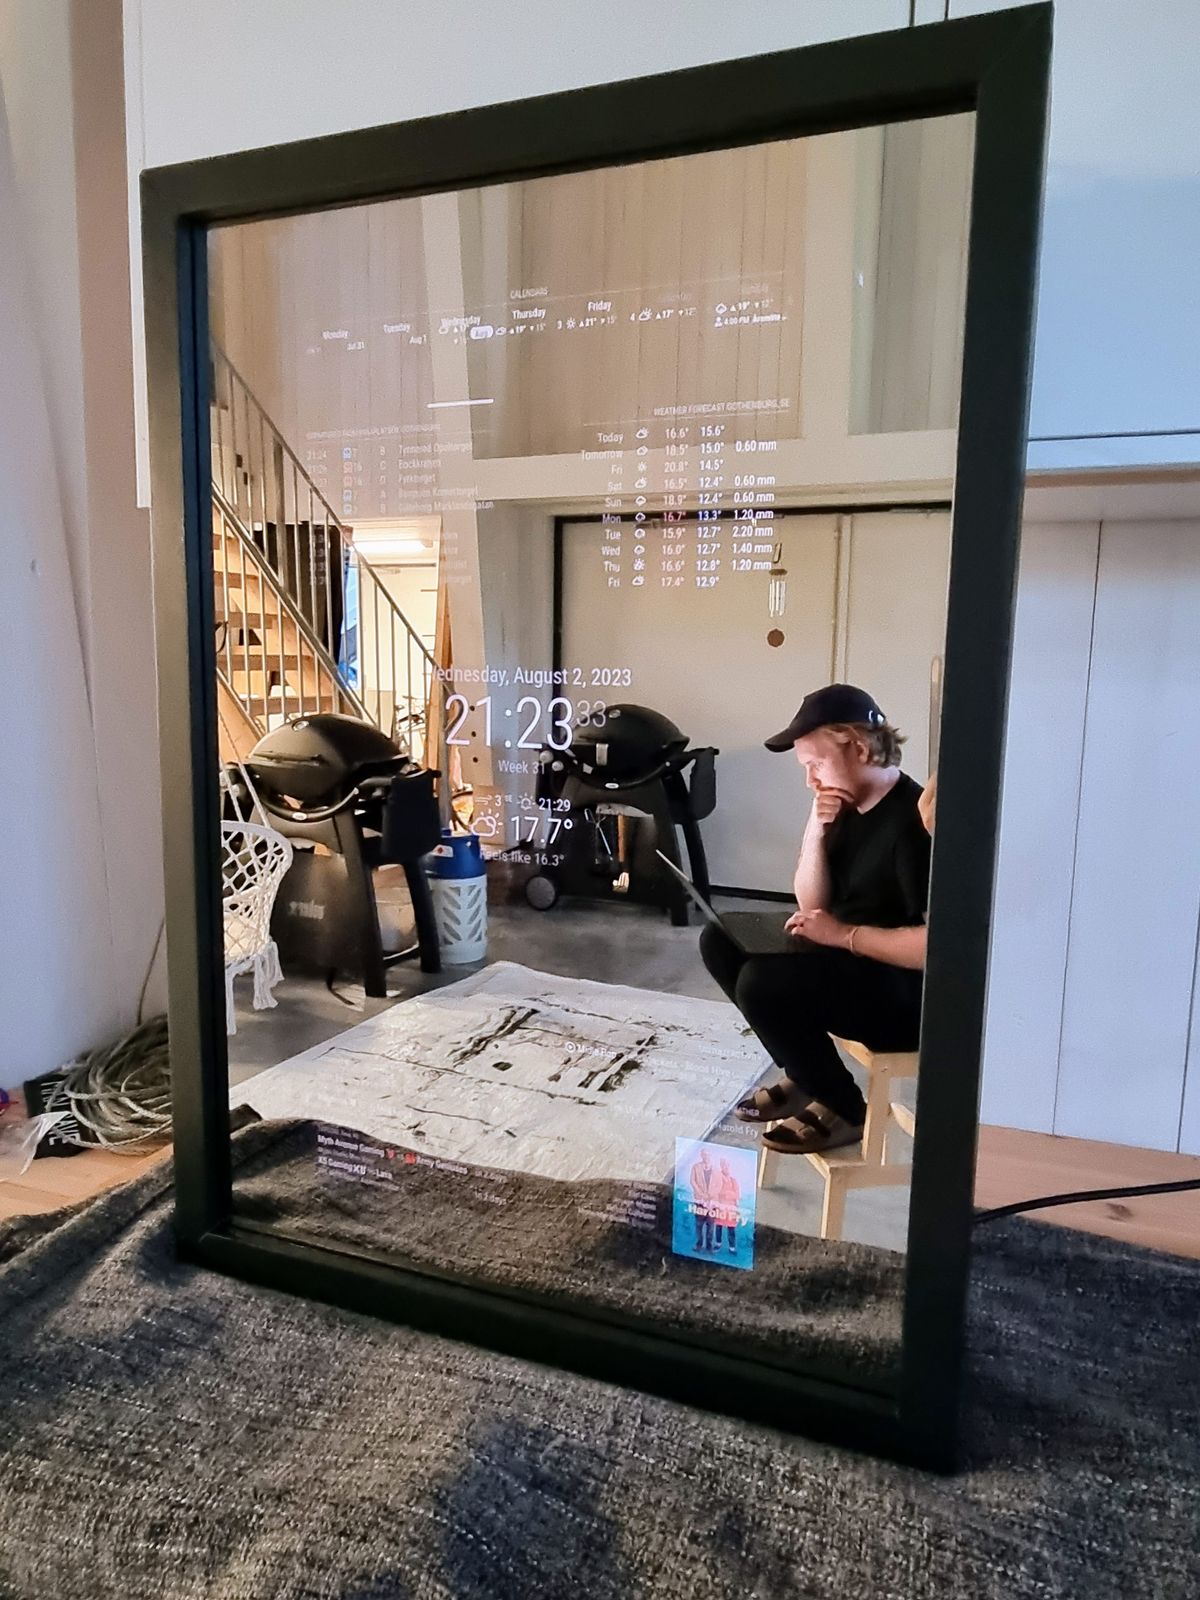
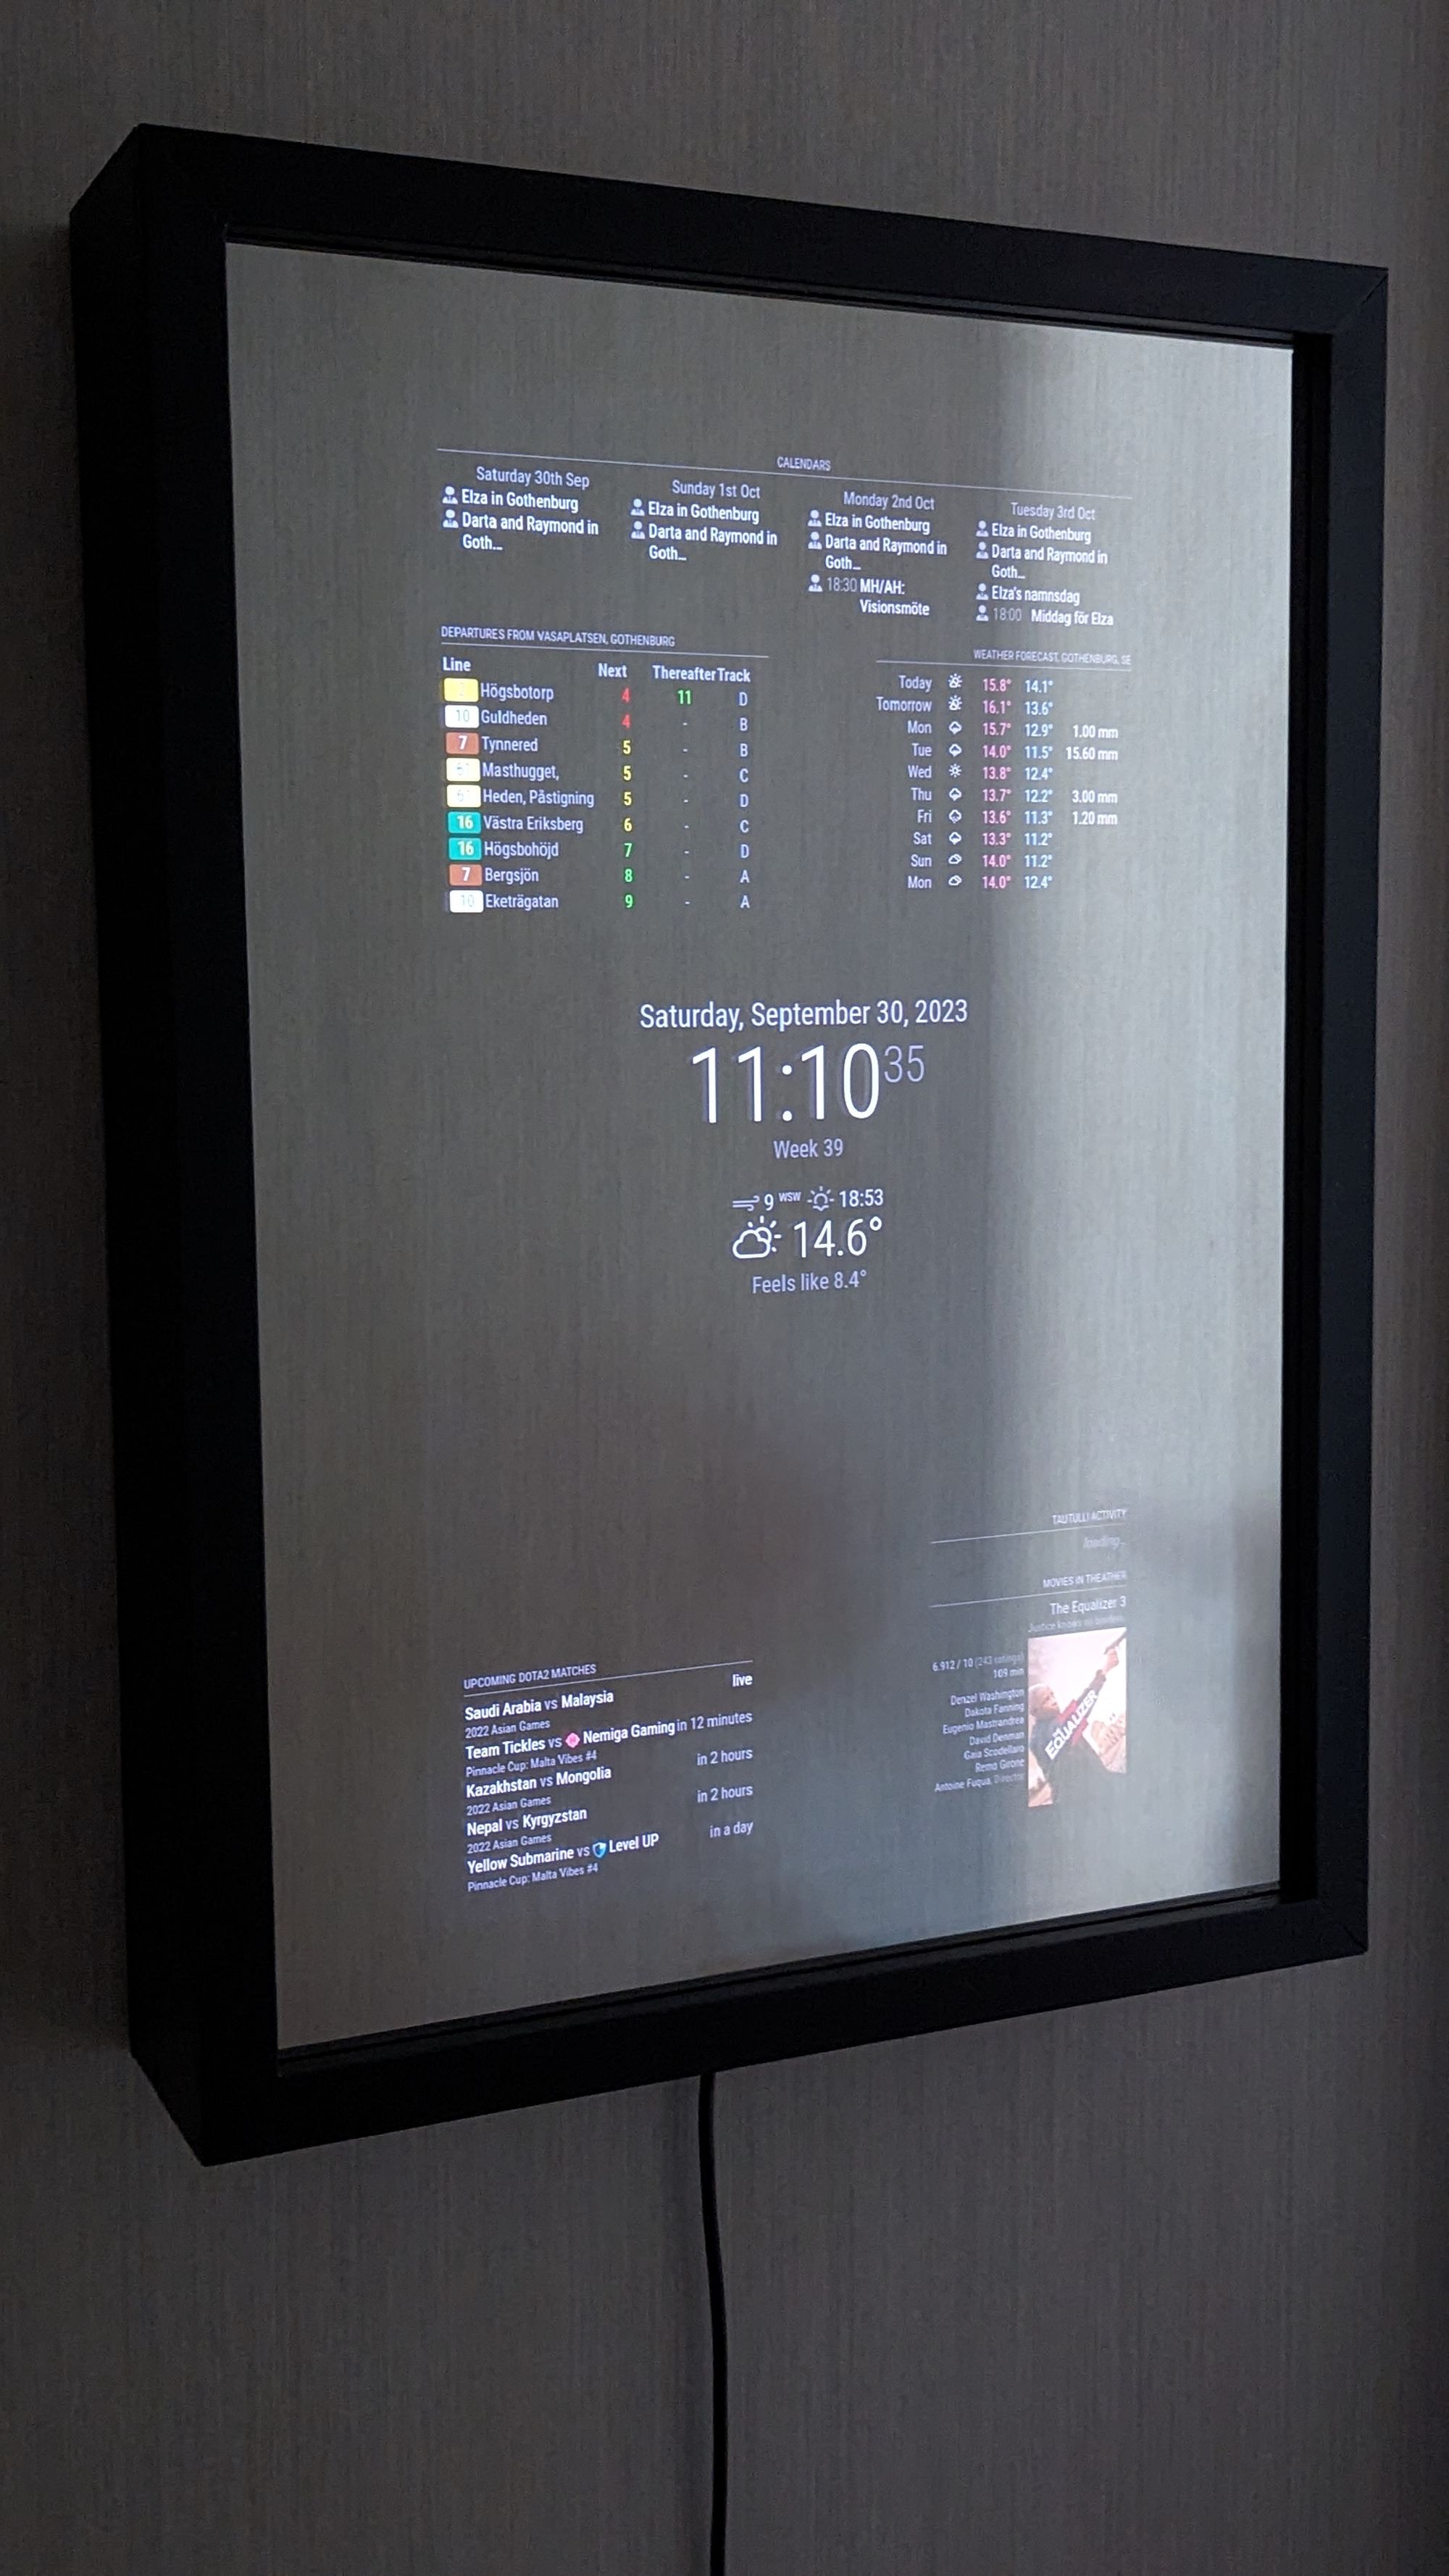
The Final Product
Conclusion
In conclusion, the journey of creating a Magic Mirror was both challenging and incredibly rewarding. It served as a fantastic summer project that not only enriched my DIY skills but also resulted in a truly self-fulfilling and aesthetically pleasing addition to my space.
I'd like to extend my appreciation to the Magic Mirror community, friends, and family for their support and assistance throughout this project. If you have any questions, or if you'd like to discuss the project, feel free to reach out to me on social media or via email. Don't forget to subscribe to my blog to stay updated on more exciting DIY projects and the latest news. Your support and engagement are highly appreciated!
Additionally, for those interested in a custom-made Magic Mirror build, please don't hesitate to contact me privately. I'd be more than happy to assist in bringing your own Magic Mirror vision to life.